Salaric


October 16, 2019

Redemption Candy Skull

Filed under: Halloween,My Drawings/Paintings — sarah @ 8:36 am

This is a water colour I painted in South Africa a few years ago whilst visiting family – I was sitting in a surfer cafe which had this interesting mix of life and death and adventure. I really liked the juxtaposition of the ideas and the naturalness of it all.

Candy Skull and Surf

The following images are close ups of parts of the paintings – it was all done free hand and on the spot.

Flower painting

Surf Board painting close up

January 1, 2017

Resolution and Goal Setting Jar

Filed under: Christmas,Paper Craft,Seasonal — sarah @ 10:37 pm

Happy New Year everyone 🙂

New Years Resolutions and Goal Setting Jar

New Years mean resolution making, this is what we have done this year – it is a resolutions and goal setting jar.

Needed:

Large jar A4 coloured paper (one colour for each person contributing to the jar) Scissors or paper gillotine Loom bands/small hair bands/small elastic bands pencil (preferably small) Small draw string bag

Divide the A4 sheets into 8 rectangles each, this can be done by either measuring or folding each piece in half three times. The write the resolutions or goals onto the small rectangles, you can include action plans or tick lists if you wish. Then roll up the small piece of paper and secure with loom band and place in jar.

If there is space left in the jar put spare rectangles in there with small pencils and bands contained in a small bag so that people can continue adding goals through out the year. Leave in prominent place so that you do not forget your goals, and take our for review on a regular bases. For those who don’t want others to read their goals stickers can be used as seals instead of bands and “do not read” can be added to the finished scrolls.

October 29, 2015

Autumn Leaf Pipe Cleaner Mobile

Filed under: Autumn,Kids Projects,Seasonal — sarah @ 3:17 am

autumn leaf pipe cleaner mobile

7 fluffy pipe cleaners in autumn colours – brown, yellow, orange, red, green

I bent five pipe cleaners into leaf shapes and then assembled them – this was super easy and something I think kids would love doing 🙂 You can even collect real leaves to model the shapes off of or find templated to guide you from the internet or craft books.

Leaf shapes bent out of pipe cleaners

October 24, 2015

Felt Muse Monsters

Filed under: Felt,Halloween — sarah @ 8:57 am

Muse Monster bits

I’ve been making some felt muse monsters to go with my writing game – I started by cutting up sheet felt – they come in packs where the sheets are about a4 paper size – I cut these into quarters for the monster bodies. Then I cut black squares for the mouths, white egg shapes for the eyes and I had some little black discs or circles of felt. I cut zig zag strips for the teeth.

muse monster and bits unsown

I laid it all out to see that it all fitted and worked well – the felt for the eyes I cut into regular same sized rectangles first so the eggs would be more uniform. I then stuck it all together with some fabric glue starting with the teeth on the black mouth squares and the pupils on the eye eggs. Then once those where dry I stuck them to the monsters bodies 🙂

sewn mouth and eyes for muse monster

These monsters are great for late felt play but could also be used to create halloween bunting 🙂

March 9, 2014

Spring has Sprung

Filed under: Art and Drawings,Easter,Paper Craft,Seasonal,Upcycling — sarah @ 12:43 pm

Spring Has Sprung Button Flower Upcyling picture

Glue – we used a latex based glue like copydex
Buttons – a mix of sizes and colours namely, pink, green, yellow
Patterned cardboard – we used graze boxes as they tend to have nice grass and flower patterns on them and are just the right size to cut up for these pictures
Scissors
Piece of ribbon or cording for the handle
Gold paint pen

Mary cutting up cardboard

Cut out two rectangles of card, select which one you want for the background of the picture and which one you want for the frame. Make sure the are the same size. For the frame cut a 2 cm strip along the bottom stopping 2 cm from the edge, turn scissors 90 degrees and cut a strip 2 cm wide up the edge until 2 cm from the top, turn 90 degrees and cut along the top again stopping 2 cm from the edge, now turn scissors again and cut down the side until you get to the first cut. A smaller rectangle of card should now pop out leaving you with a frame – put this to one side for now.

Laying out buttons for spring upcycling picture

Lay out the buttons you have chosen in the shape you want, check that it will fit within the frame and then glue them in place.

Frame and handle added to button picture

Cut a piece of ribbon or cord for your handle and glue it in place – ribbon works better as the frame can side flat over it. An alternative is to stick the handle on the back but you will have to wait for the picture to dry before you can do this. Glue the frame in place pinching down over where the hand is – cloths pegs can help as mini clamps if it is being problematic.

Mary colouring in with gold paint pen

Draw or write with paint pens – I did a wrote Spring and then drew a spring as an exclamation mark.

Spring Has Sprung Button Flower Upcyling picture

This is my creation – the toddler spilt her milk on her one, it was a sheep and she had given it gold ears.

October 1, 2013

Loo Roll Bat

Filed under: Halloween,Kids Projects — sarah @ 9:51 am

Loo Roll Bat

This bat was made by my pre schooler at nursery and it is a quick easy craft – there is a cardboard roll like those inside of loo rolls and kitchen towel which has been covered in black card, a circle of card with eyes added for the face and flappy wings cut out of the same card, string added so that it can be hung up 🙂

October 21, 2012

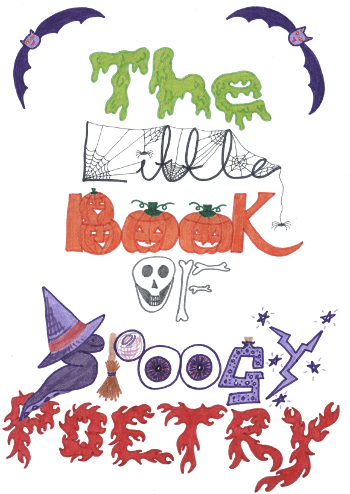
The Little Book of Spoogy Poetry

Filed under: Books,Events,Halloween,My Books,My Drawings/Paintings — sarah @ 10:57 am

Image is a link to a free PDF of the book!

The Little Book Of Spoogy Poetry

A few years ago to entertain my then just turned 4 yr old I wrote a series of kids poems and we made a little book with me handwriting the poems and drawing some quick pictures in felt tip pen. My little girl liked it so much she took it to school with her where to my embarassement the head master saw it and thought it was great.

I typed up the poems and took photos of the book assembly – for this blog and thought that was the end off it all – especially when the book got a cup of water spilt on it (much to my annoyance and the tears of a little one). But I then ended up writing a Little Book of Poetry for all sorts of other events and festivals like christmas and the birth of my second child and to stop the heart ache of the first ones destruction I scanned the pictures I drew.

People kept telling me that I should release the books but I thought I should digitise the pictures so I spent ages trying to draw the pumpkins and things but I found that it just came out looking like a cheap hobbled together image and that was not what I wanted. Then I came to the realisation that this was not needed and that the felt pen look was a good for kids books. So I drew pictures and have run them through a few filters and things to clean them up etc… (I found that different sketch books have slightly different coloured paper in them which needed to be sorted etc…).

But the up shot of all this is that tomorrow I am having a virtual launch party of an e-book (PDF) of The Little Book of Spoogy Poetry. I will be giving things away and there will be author interactions etc… The PDF will be available for FREE until midnight on the 31st of October 🙂

Enjoy.

August 18, 2012

Spiral Snakes

Filed under: Halloween,Kids Projects,Paper Craft — sarah @ 9:51 am

Jeans spiral snake

Spiral snakes are very easy to make and can be hung up around the place as jungle or halloween decorations. When I was little my Welsh grandmother used to make a variant of these for Christmas (less snaky 😉 ).

Green circle

Draw a circle and cut it out – pre cut circles save a lot of hassle when doing this project with small children.

Asleep snake

Draw a spiral and then add snake makings and face to it – this can be done with pens and pencils or with stickers or ink/paint stamps or even embossing for a more subtle patterning.

Awake Snake

Then cut around the spiral. There are many templates that you can by or find for free download on the internet but I find free hand ones work just as well 🙂

Spiral snake

To add string either punch a whole and tie the ribbon or thread onto it or use tape. They will dance and move in thermals air currents.

April 27, 2012

Monster Bag

Filed under: Halloween,Sewing — sarah @ 9:15 am

Monster Bag

My mother made me a monster bag to go with my Muse Monster writing game and various other monstrous things 🙂 It is made from a heavy weight cotton and the face is sheet felt that has been stitched onto it.

October 28, 2011

Halloween Play House Base

Filed under: Halloween,Kids Projects,Paper Craft,Upcycling — sarah @ 9:58 am

A server box

We turned this server box into a halloween play house for our child. Any large cardboard box will do.

Alaric inside the server box tapping up the bottom flaps for extra strength

First off Al claimed inside the box and tapped up the bottom so that the house would have a floor – there where two reasons for doing this – 1) so that it would be a contained play space and 2) to give the play house more structure integrity. Also you can use tape to make a larger structure out of smaller pieces of card if you do not have a large enough box.

Cutting the windows

Using a stanly knife we cut the door and window – scoring one side of the door so that it was still attached so it could be opened and closed – similarly the window was cut so that it would be a shutter using a pre-existing whole a thumb whole to open and close them.

Windows complete with shutters

We then put tape around the edges to reinforce and to cover up the rough edges of the corrugated cardboard.

Door

This was the base – we then made it tall enough for our child to stand up in using more card and the hot melt glue gun.

Parcel tape on rough cut edges

We then decorated the inside and out with them which will be covered in another post.

Parcel tape on edges

This play house lasted a couple of years and finally died being used in the garden as a Wendy house when I forgot to bring it in and there was a storm!

Next Page »